The following day I had a workshop on said skill. During this workshop we looked at how to unwrap, correctly, many primitive shapes such as a cube, which we later textured to look like a dice, a torus and a cylinder. I did struggle with this as it was a hard thing to get correct but I see why it is so vital and why artist send hours on end working a good UV and utilising space within the UV snapshot as this takes up memory and so the space on a UV is incredibly precious. So when I returned home I practiced this in the hope of improving.
Later I tried texturing a cylinder I had unwrapped, to look like a soup can that you might see in a game like the 'Last of Us' when rummaging around in a draw for supplies. As my first attempt at home by myself I was fairly happy with the overall outcome. You can quite clearly see the seam of the wrap that runs down of this texture but for this design it doesn't look entirely bad due to the fact that an actual soap can would have a seam where the paper of the design would lap over and connect together.
This week there was no task to be completed at home like the week before with the lamp designs. So I took the time to practice designing more complicated meshes. The first thing I had a go at designing was 'Han Solo's' blaster in a Disney Infinity style i.e. with more round and emphasised edges to make the design closer to a 'Disney Infinity Character'. This taught me a few lessons one being always work with references when designing in 3D as having multiple images of reference helped to make a more concise 3D representation of the blaster. Another lesson was to know when to give up and start again. When building this design I noticed that I made the mistake of not checking the other side of the design regularly and what I had done, is that I had grabbed vertex's belonging to the other side and dragged them around when performing manipulations on the other side. In turn destroying that side. I then spent a good hour trying to rectify the image when there was no hope and I had to start again.
After starting again and finishing this time with less trouble I couldn't be happier with the overall outcome of the design it has the exact atheistic that I wanted following the 'Disney Infinity' vibe.
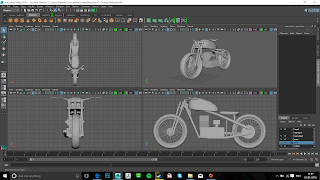
The following day we had a Crit session where my work was well received with lots of questions of how I did particular things to do with my 'Disney Lamp' but many really took a liking to my blaster and the design. After the Crit session I returned home with some enthusiasm so I decided that I really wanted to push myself and begin to design a motorbike with the atheistic of that of a bobber bike. The hardest part of this design by far was the spokes that took time and a lot of effort to look remotely right and in the end I just decided to go with a that'll have to do mentality. I really enjoyed creating this design as I only was blocking out all the shapes for the most part. My favourite part of the design were the brake and clutch leavers as they just turned out perfect with little effort.
Like the week before I was overall very happy with my outcomes as I have worked really hard to produce some stunning pieces for someone who only touched Maya for the first time last week.


No comments:
Post a Comment